Tripwires Webhook Setup Guide
Send NodeZero Tripwires alerts to your SIEM, SOAR, or automation platform as they happen. The Tripwires Webhook connector posts each alert as a JSON event to an HTTPS endpoint that you control.
This guide covers the NodeZero Portal side of the setup. You'll be working here:
Settings > Integrations > Add Integration > Tripwires Webhook
NodeZero orientation
See Using Integrations for background on NodeZero connectors, instances, datasets, routes (described there under their earlier name, workflows), and the controls common to every connector.
Contents
- What This Integration Does
- Supported Endpoints
- Before You Start
- Connect the Instance
- Create the Route
- Test the Integration
- Check Delivery
- Edit, Pause, or Delete the Integration
What This Integration Does
NodeZero sends one event to your endpoint each time a tripwire fires.
- Direction: one-way, NodeZero > your endpoint. Nothing is read back.
- Transport: HTTPS POST to the endpoint URL you provide, with any headers you add.
- Trigger: automatic. NodeZero dispatches when a tripwire fires, including test alerts.
- Data set: Tripwires.
Test alerts are labeled as tests in the event, so your receiver can tell them apart from real alerts.
You can connect more than one instance, such as one per SOC tool or environment. Each instance needs its own Tripwires route.
Supported Endpoints
The connector works with any receiver that accepts an HTTPS POST with a JSON body. Setup guides for common receivers:
Your endpoint URL must meet these requirements:
- It uses HTTPS.
- It carries no username or password. Send credentials in a header instead.
- Its domain is on the Horizon3 list of approved webhook domains.
Requesting a new endpoint
If your receiver's domain isn't on the approved list, NodeZero won't accept the endpoint. Contact your Horizon3 representative to request that the domain be added.
Before You Start
Confirm you have the following:
- The Org Admin role in NodeZero. Other users can view integrations but cannot change them.
- A receiver that is ready to accept events, with its endpoint URL.
- The name and value of any header that your receiver requires, such as an API key or token.
Connect the Instance
Create an instance of the Tripwires Webhook connector that points at your receiver.
- In the NodeZero Portal, go to Settings > Integrations, then select Add Integration.
-
In Choose a connector, select Tripwires Webhook, then select Next.
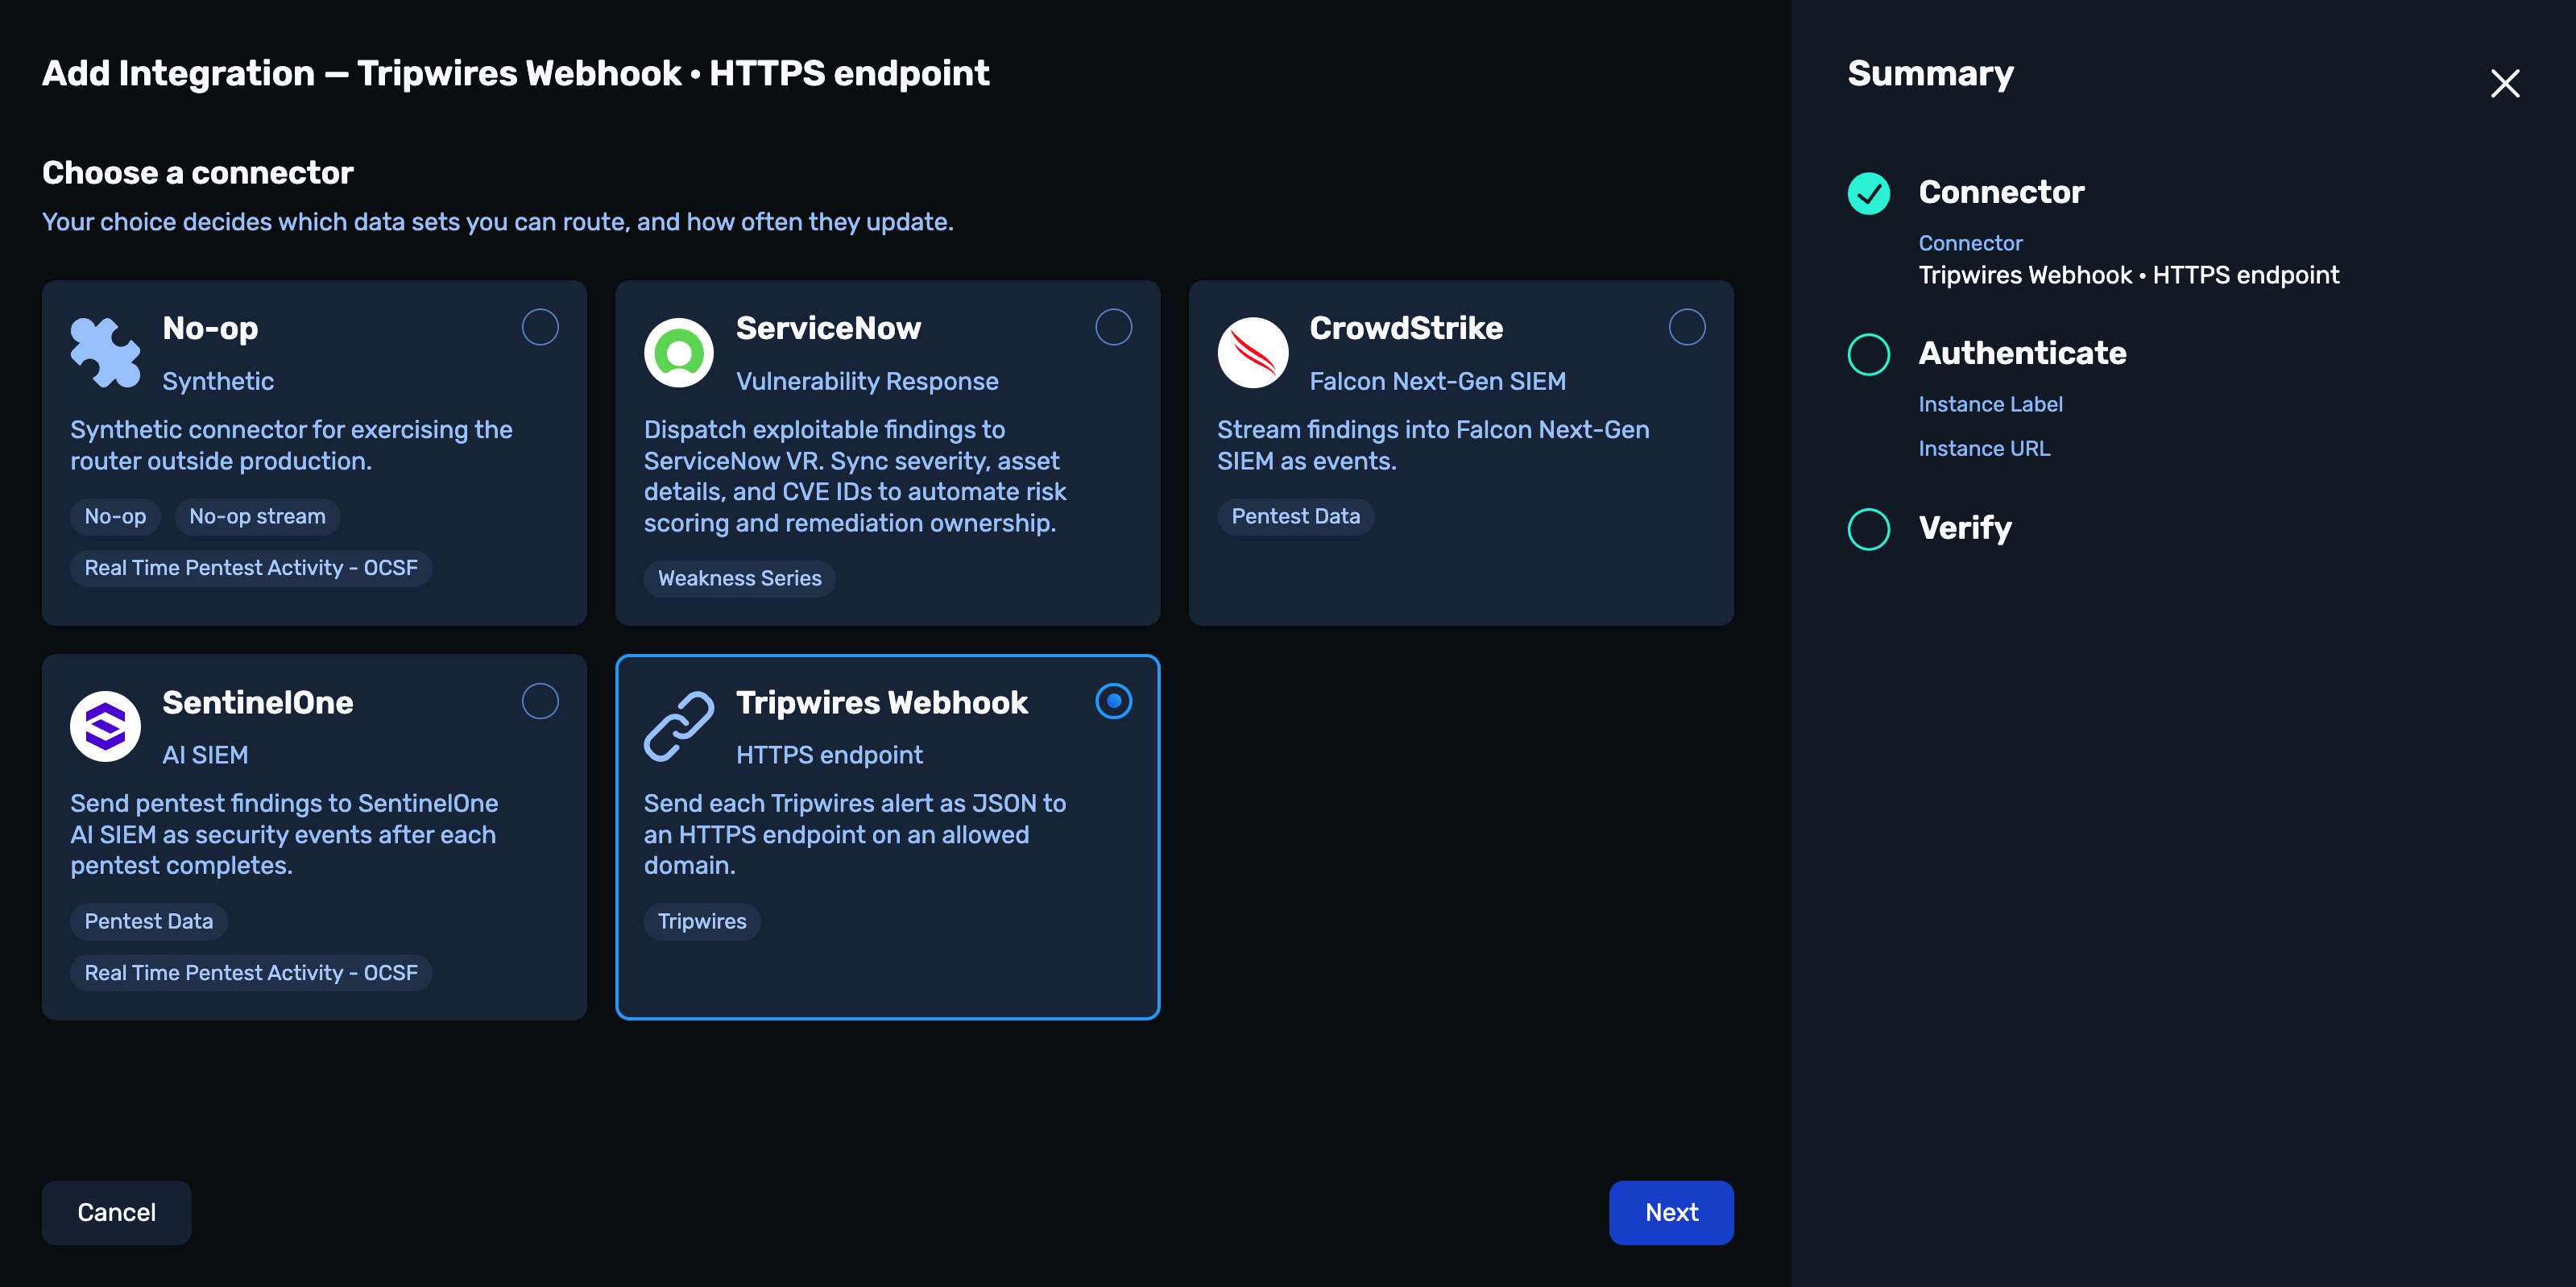
Choosing the Tripwires Webhook connector
-
Enter the instance details:
- Instance label – your name for this instance, such as
SOC – Splunk Cloud. It appears in the route, the destination picker, and the Activity Log. - Instance URL – the endpoint URL of your receiver.
- Headers (optional) – for each header that your receiver requires, select Add Row, then enter its Name and Value.
NodeZero sends each header unchanged with every request. Header values are stored encrypted, as the credential for this instance, and are never displayed back to you.
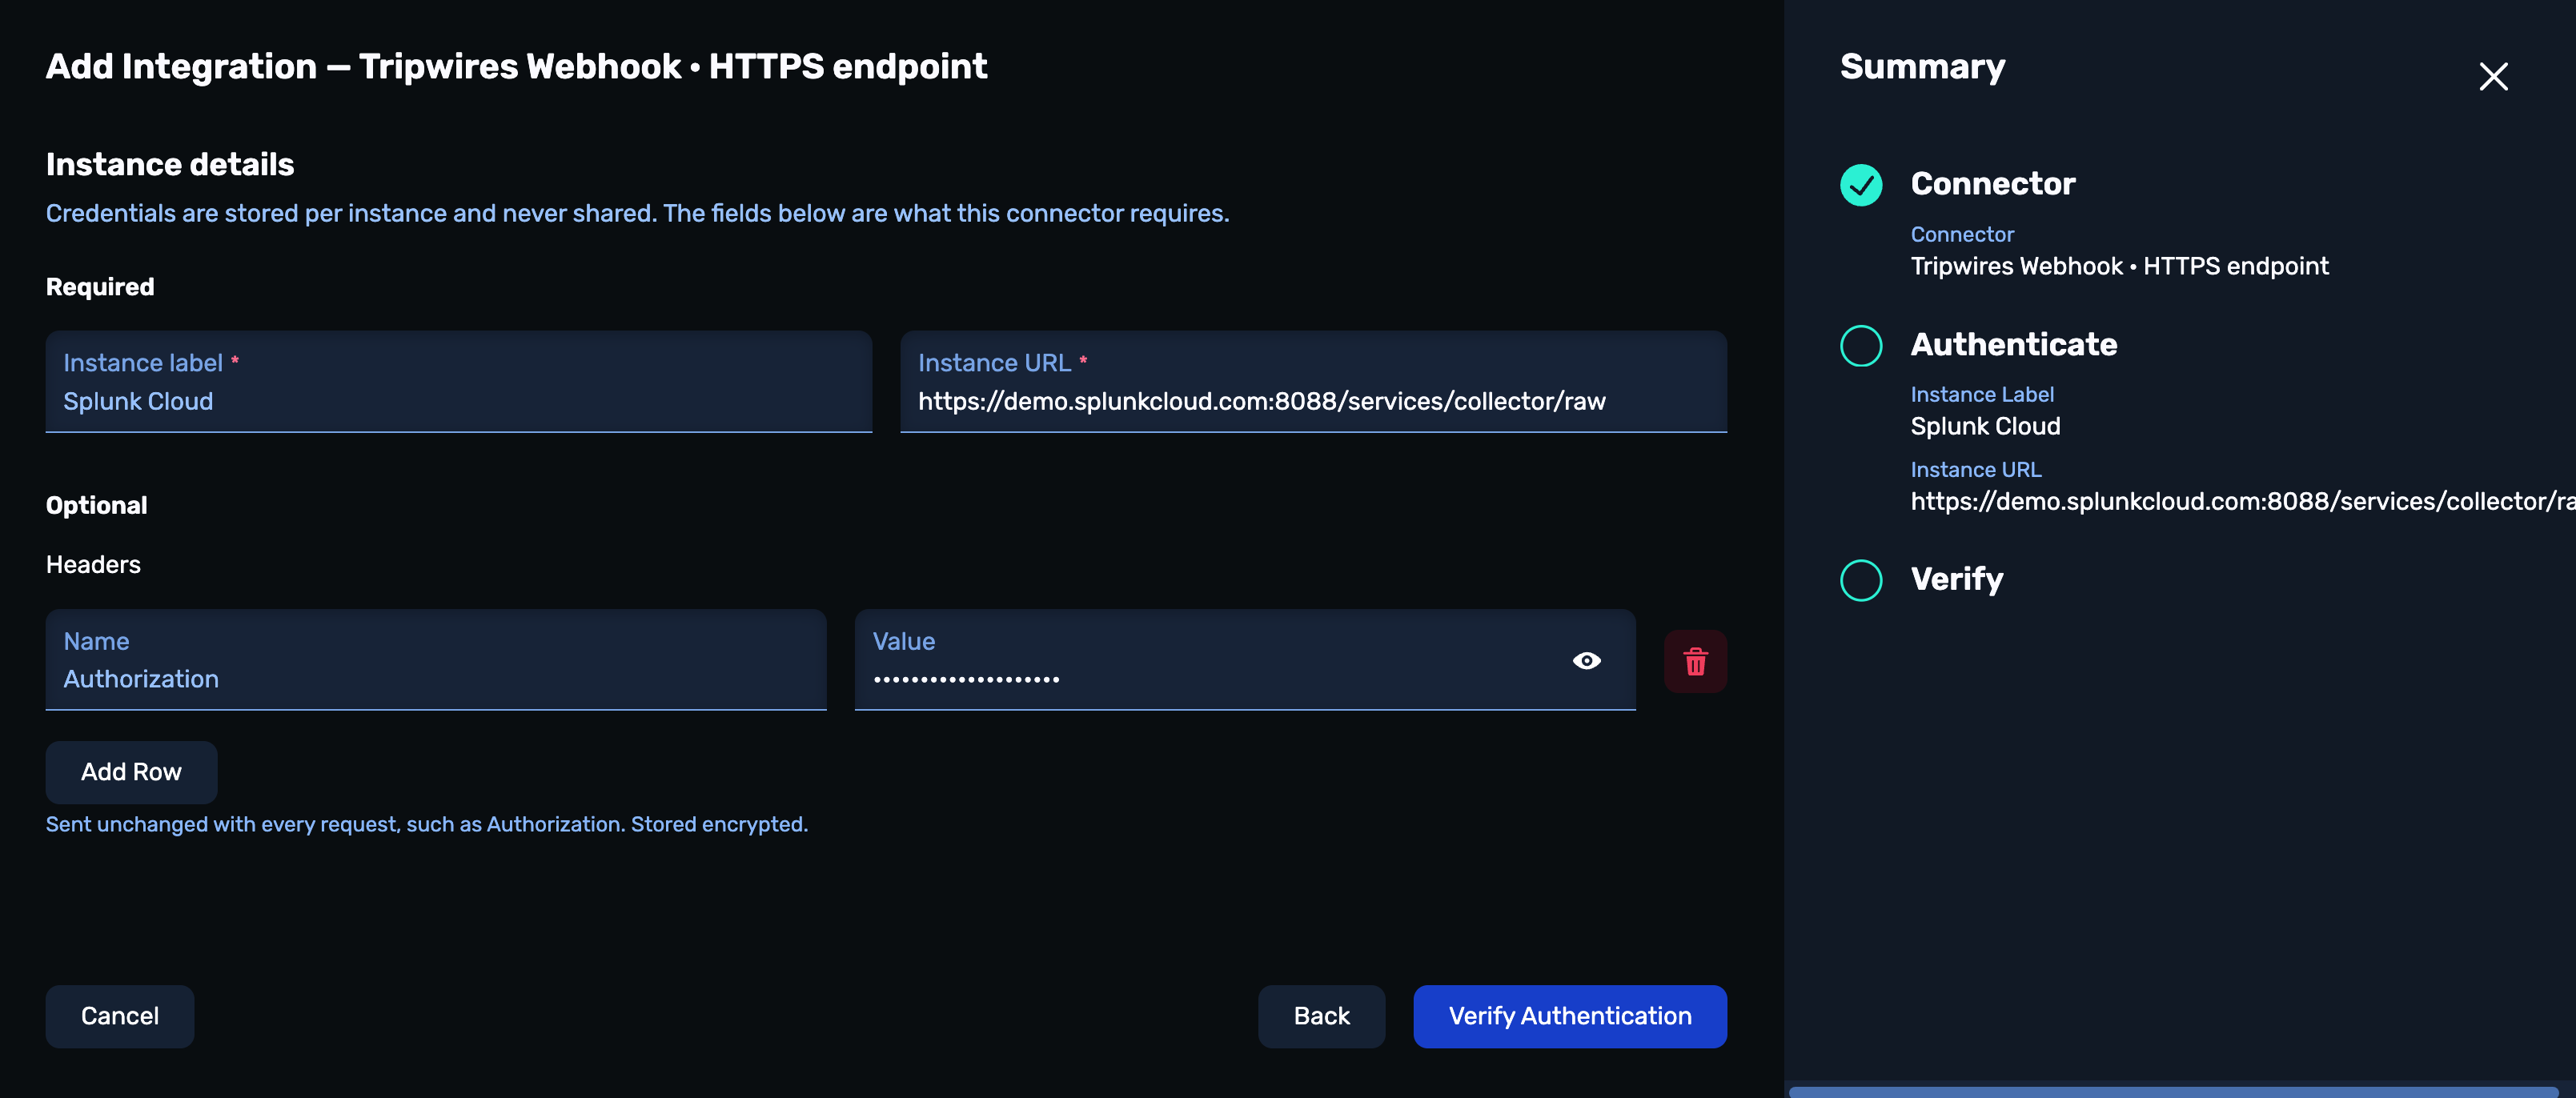
Instance details with one header added
- Instance label – your name for this instance, such as
-
Select Verify Authentication, then complete the Verify step.
- Select New Route to continue to the next section. You can also finish now and add a route later.
For details on each step of the wizard, see Adding an Integration.
Create the Route
A connected instance receives nothing until a route names it as a destination.
- If you selected New Route, the modal opens with your instance preselected as the Destination. Otherwise, start a new route from the instance's ⋮ menu.
- For Data set, select Tripwires.
- Leave Activate this route checked.
- Select Save Route.
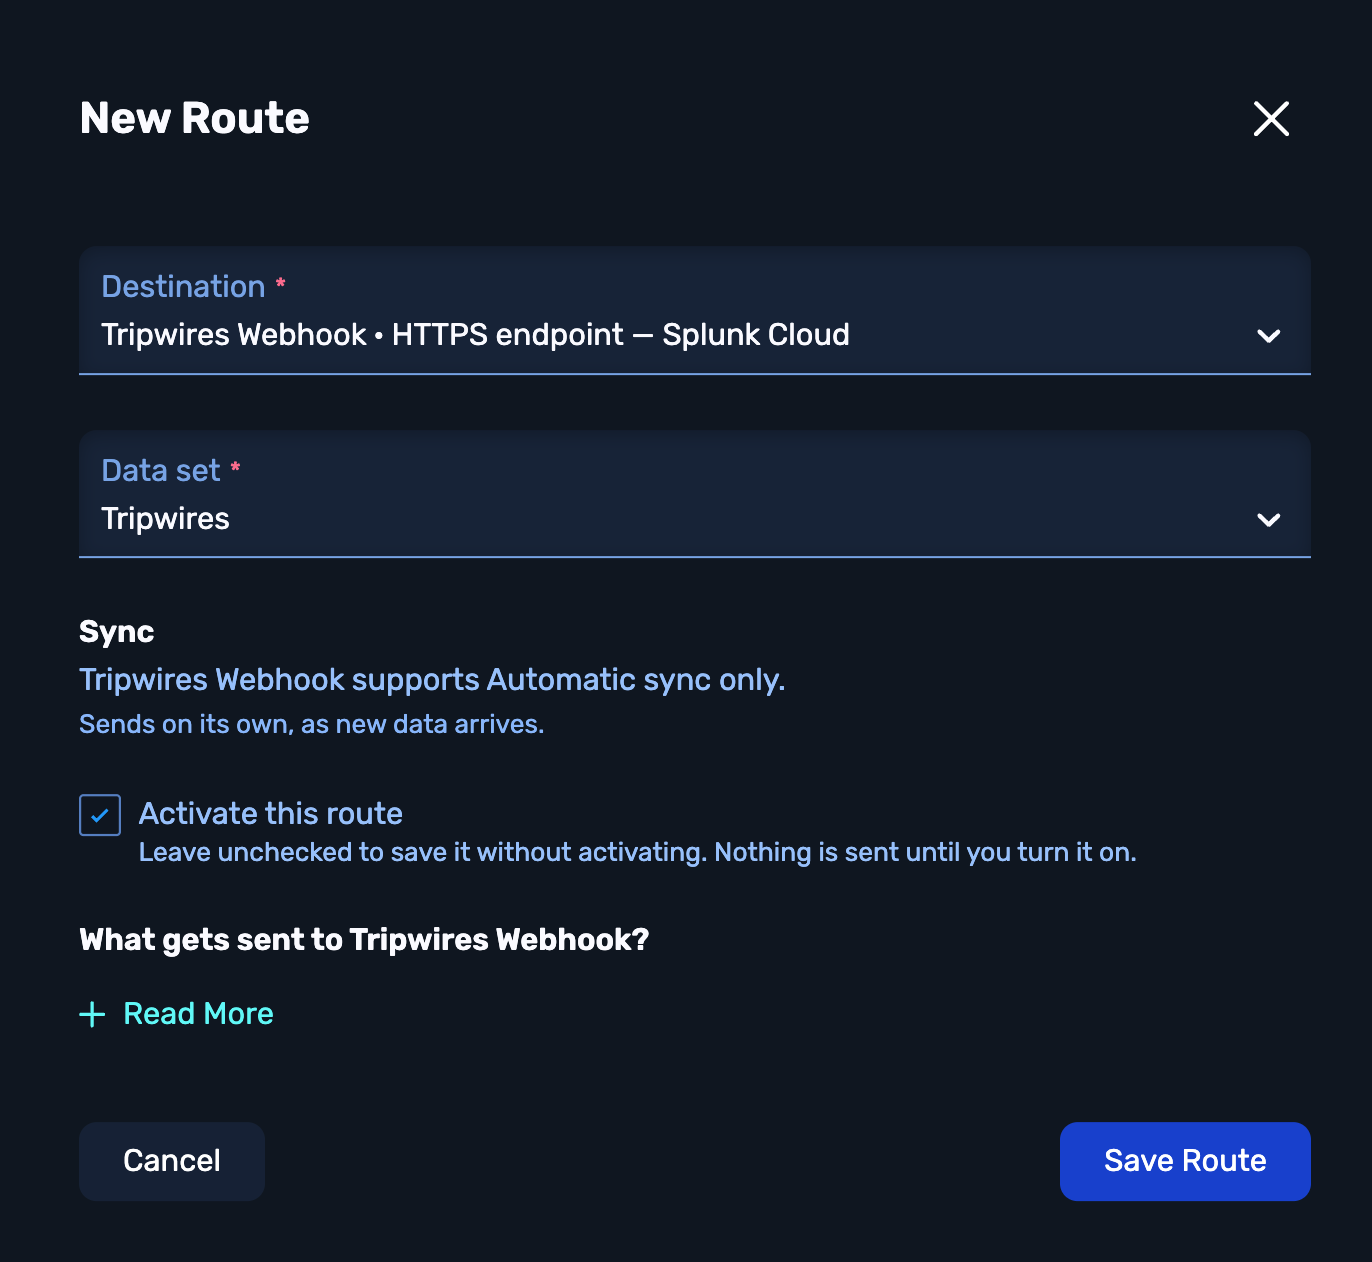
Creating the Tripwires route
NodeZero now sends an event to your endpoint each time a tripwire fires. For details on routes, see Workflows, which describes them under their earlier name.
Test the Integration
Test the connection and the full delivery path:
- Connection: from the instance's ⋮ menu, select Verify Now. NodeZero re-runs the connector's checks against your endpoint. For details, see Verifying on Demand.
- End-to-end delivery: trigger a test alert from a tripwire, as described in Testing Tripwires. Confirm that the event arrives at your receiver and that NodeZero records the dispatch, as described in the next section.
Check Delivery
NodeZero records each dispatch to your endpoint in two places:
- Connected Integrations tab: the Last Dispatch column on the instance row shows the time and outcome of the most recent send. Select the instance for more detail. See Last Dispatch.
- Activity Log tab: lists every dispatch across all integrations. Filter by route to see only this integration, and select View on a row to open its details. See Activity Log.
If a dispatch fails, you can retry it from the Activity Log. See Retrying.
Edit, Pause, or Delete the Integration
Manage the integration from the instance's ⋮ menu on the Connected Integrations tab:
- Edit Instance – change the label, the endpoint URL, or the headers. Saving re-verifies the instance. See Rotating a Credential.
- Deactivate – pause delivery without losing the configuration or dispatch history. Select Reactivate to resume.
- Delete Instance – permanently remove the instance, its routes, and their dispatch history.
For details, see Managing Instances Over Time.